HOW TO MAKE HEART IN GIMP
There are many ways to create heart shape in gimp. I didn't invent or discover them but there are many different tutorials from different authors. I have just put them together so that in future me or anybody else may not waste time in finding the way to draw a heart in gimp.
GEOMETRIC METHODS
2 Circles and One Square
Select the Rectangle Select Tool (R) of fixed size 150px by 150px and draw a selection on the canvas.
Select Rotate Tool (Shift+R) and from Tool Options select 'Selection' and then rotate the selection through 45 degrees. Fill the selection with any colour you like.

Select the Ellipse Tool (E) and fix its size to 150px by 150px. Also check 'Expand from Center' option. Make a selection along right side of the rotated square.

Do not deselect the 'selection'. Again click inside the selection and its bounding box will appear. Or you can make another circle with the same settings. Move the second circle to left side of the square.

Fill it with the colour. You have 'heart' shape on the canvas.

Select the Ellipse Tool (E) and fix its size to 150px by 150px. Also check 'Expand from Center' option. Make a selection on the canvas. Make another selection of circle which should slightly overlap the selection of first circle as shown in the image, Fill it with some colour.

Now drag a horizontal guide and place it at about the last quarter of the circles.
Also drag one vertical guide and it should be at the intersection of the circles.

Fill the selection with the colour. Your heart is complete.

Gimp Method
Create a New Image.

Drag some guides on it. Go to the menu Image Guides-->New Guide .... and open 'New Guide' dialogue. Create first horizontal guide at 100 px.


Next make two 'VERTICAL' guides; first at 320 px and the 2nd at 450 px. You would have a canvas like this:-

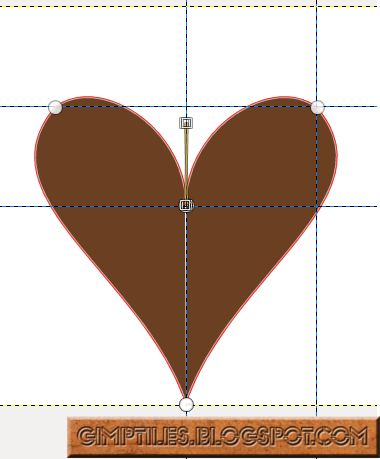
Drage the paths outwards as shown in the image.


You can have a heart like this or you can modifiy its shape by changing its handles.


After that In the Paths Window Click the button which converts paths to selection.

Fill the selection with any colour but I am filling this heart with chocolate colour.


Continued...
No comments:
Post a Comment